The engine oil cooler
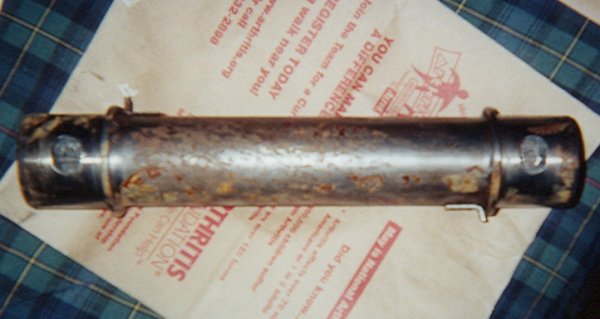
The center part of the engine oil cooler. Engine coolant flows from one end to the other while the engine oil flows in one top hole and out the other. In normal operation, there are two end caps on this, which have bolting points to attach to the block along with passageways for both the coolant and the oil into the block. The rearmost end cap also contains the header for the oil filter.
Please note that this is an early-style oil cooler assembly. I found out through a publication issued by Ford that the oil cooler design was updated early in the 1984 model year. This update began with engine block serial number 6.9D U2U 061494. The serial number on my engine is 6.9D U2U 048458, so there were roughly 13,000 engines built after mine before they updated the design. This proved to be a problem, as most people on TheDieselStop.com have the newer design, and this led to a few misunderstandings, most notably when I bought the replacement O-rings that go between the oil cooler and the end caps on each side.
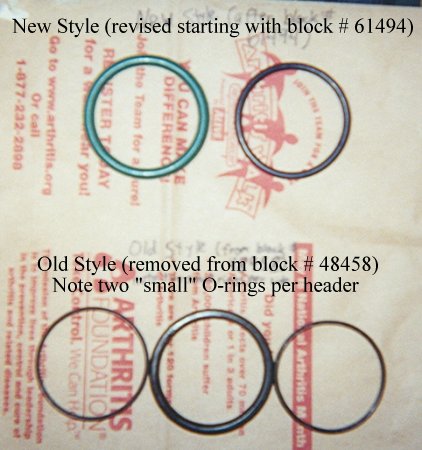
The oil cooler O-rings. On top are the newer style O-rings that I bought before realizing that my oil cooler was different. Note that there is one large O-ring and one small O-ring. On the bottom are the three O-rings that came out of one end cap on my oil cooler. On newer oil coolers, there is a groove near the end of the center portion that the smaller O-ring sits in; my earlier assembly lacks that. The large O-rings are actually similar, so I didn't need to return them to Ford when I returned the smaller O-rings. At Ford, I found it necessary to order the replacement O-rings, and I found out that the older-style O-rings have been discontinued. I got lucky; a different Ford dealer had some onhand, so I was still able to order them.
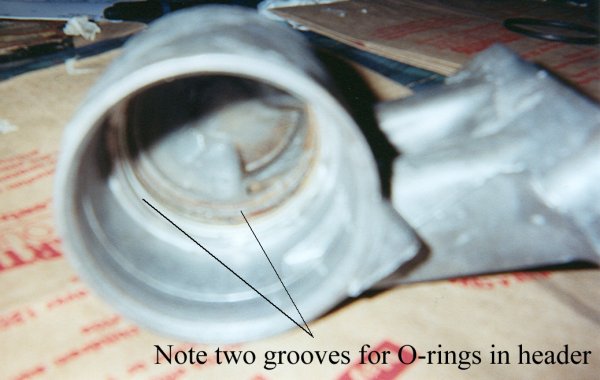
This is the forward end cap. I apologize for the low quality of the picture, although you can still make out that there are two O-ring grooves in the end cap for the O-rings. Newer oil coolers have a single groove, and the groove is apparently smaller, as people have had problems with the O-rings being cut when trying to re-install the end caps onto the center piece. Maybe I'll be immune to that problem?
Removing external parts and accessories
Heads, gaskets, and the block after head removal
Removing timing gear cover and camshaft
Cleaning the ins and outs of the engine
Final engine block cleaning with compresed air
Oil cooler disassembled
Assembling and testing the oil cooler
First steps of modifications for the turbocharger
Comparing the stock head bolts to ARP studs (lengthy!)
Installing the intake manifold and injector pump
Assembling and installing the turbocharger