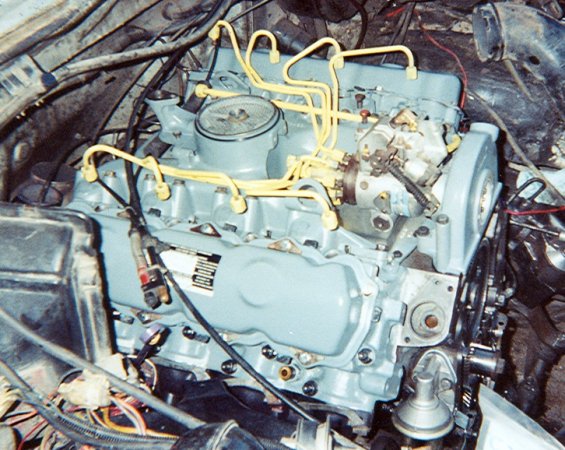
Intake Manifold and Fuel Injector Pump
Intake manifold and fuel injector pump installed. The piece at the rear of the intake manifold (where the crankcase depression regulator (CDR) valve was originally installed) is where the turbocharger mounts to. This also serves as the drain for the engine oil lubricating the turbo, draining through the valley pan into the engine.
Also, note the third cable bundled in with the throttle and cruise control cables (hanging over the passenger's side valve cover, although they will eventually be attached to the injector pump). This cable was originally for an overdrive unit that was removed before I got the truck. The cable goes into the cab. Unfortunately, I didn't take any better pictures of this part of the project, but I cut the cable so that it was shorter than original and used a chain to connect the cable to the injector pump arm where the throttle cable connects to. The result, while not quite the hand-throttle I was originally hoping for, is essentially an analog version of the AIC modification done by many Powerstroke diesel owners. This cable has enough internal resistance that it will hold in any position I pull the cable to, allowing me to set the throttle from anywhere to the pump's original idle (where I normally keep the cable set) to wide-open throttle. This is useful for setting a high idle if I'm idling for an extended time, or if I ever install a PTO-driven accessory on the truck. The chain allows the injector pump arm to move fully without the cable being pulled, meaning that I can use the standard foot pedal as normal, and the cruise control even still works properly.
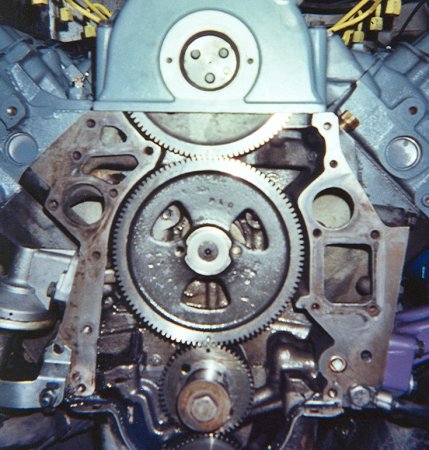
I took this picture to verify, for my own peace of mind, that all timing gear marks are properly aligned. The mark on the injector pump drive gear (driven by the camshaft drive gear, at the very top) is almost invisible, but you can barely see it. I'm also just about ready to re-install the timing gear cover.
Removing external parts and accessories
Heads, gaskets, and the block after head removal
Removing timing gear cover and camshaft
Cleaning the ins and outs of the engine
Final engine block cleaning with compresed air
Assembling and testing the oil cooler
First steps of modifications for the turbocharger
Comparing the stock head bolts to ARP studs (lengthy!)
Installing the intake manifold and injector pump
Assembling and installing the turbocharger